Table of Contents
ToggleMobile home kitchens come with their own set of quirks, shallow cabinets, lightweight flooring, and structural constraints that standard home remodel advice often ignores. But that doesn’t mean they’re stuck in a time warp. With the right approach and materials designed for manufactured homes, even a dated galley kitchen can become a functional, modern space without very costly or the floor joists. This guide walks through practical remodel ideas that respect the unique construction of mobile homes while delivering real visual and functional impact.
Key Takeaways
- Mobile home kitchen remodel ideas must account for unique HUD Code construction, including shallow cabinets, lighter framing, and weight-restricted floors that differ from standard home remodeling standards.
- Budget-friendly updates like painting, swapping hardware, installing peel-and-stick backsplashes, and adding open shelving can transform a dated kitchen for under $500 in a single weekend.
- Lightweight flooring options like luxury vinyl plank (LVP) are ideal for mobile homes since they float over existing subfloors without adding excessive weight or requiring reinforcement.
- Cabinet refacing, pull-out organizers, and narrow pantry insertions maximize storage in mobile home kitchens with shallow cabinets while respecting structural load limits.
- Upgrading lighting with under-cabinet LED strips, dimmer switches, and flush-mount fixtures creates a brighter, more spacious-feeling kitchen without requiring heavy structural modifications.
- Always check the home’s data plate for manufacture date and weight ratings before starting any mobile home kitchen remodel to ensure materials and modifications are structurally feasible.
Why Mobile Home Kitchens Require a Different Approach
Mobile homes, also called manufactured homes, are built to HUD Code standards, not the International Residential Code (IRC) that governs site-built houses. That means lighter framing, thinner walls, and floors designed for specific load limits.
Cabinets are often shallower (around 12 inches deep instead of the standard 24), and wall studs may be spaced at 24 inches on center rather than 16. Floors typically sit on I-beams or steel runners with particleboard subflooring, which can’t handle the weight of full-thickness tile or stone without reinforcement.
Electrical and plumbing runs are also more compact. Moving a sink or adding a new outlet might require surface-mounted conduit or creative routing. If the home was built before 1976, it may fall under older mobile home standards with even fewer load-bearing options.
Before starting any mobile home remodel project, check the home’s data plate (usually in a bedroom closet or near the electrical panel) for manufacture date, weight ratings, and model specs. These details dictate what’s structurally feasible.
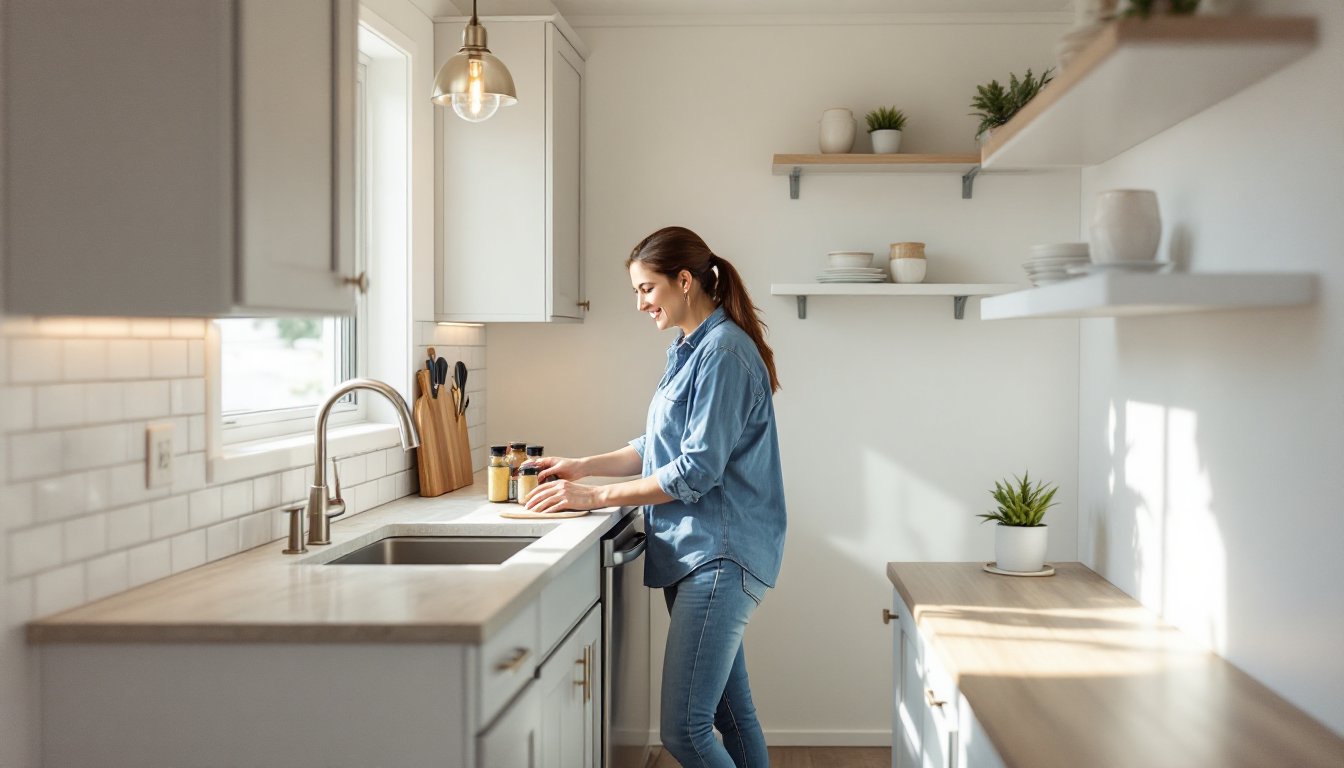
Budget-Friendly Updates That Make a Big Impact
Not every remodel needs a sledgehammer. Some of the most effective changes cost under $500 and take a weekend.
Paint the walls and ceiling. Mobile home kitchens often have textured vinyl wallboard or wood paneling. Clean surfaces with TSP (trisodium phosphate), then prime with an adhesion primer like Zinsser Bulls Eye 1-2-3 before applying satin or semi-gloss paint. Light colors make cramped spaces feel larger.
Swap out hardware. Replacing cabinet pulls, drawer handles, and faucet fixtures instantly updates the look. Stick with standard hole spacing (3-3/4 inches for pulls, single-hole for knobs) to avoid drilling new holes.
Install a peel-and-stick backsplash. Products like Smart Tiles or aluminum composite panels mimic subway tile or stone without the weight or mess of mortar. They adhere directly to clean, smooth surfaces and can be cut with scissors or a utility knife.
Upgrade the faucet. Many mobile homes come with builder-grade faucets that leak or corrode quickly. A mid-range pull-down faucet (check that it fits the existing sink holes) improves both function and aesthetics. Make sure the supply lines and shut-off valves are accessible before starting.
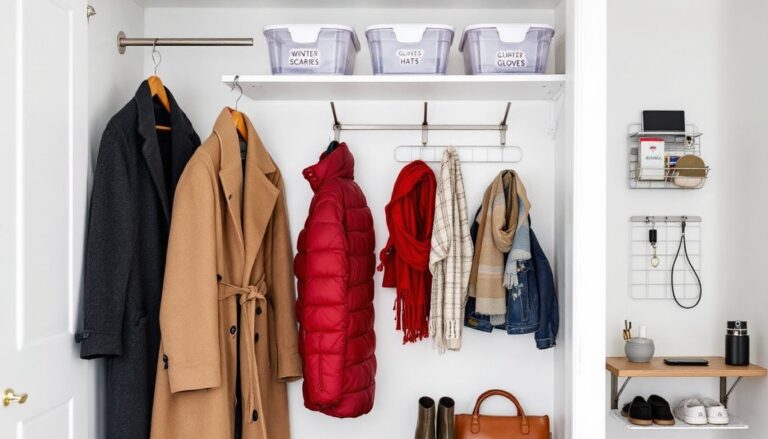
Add open shelving. If upper cabinets feel dated or bulky, remove a few doors and paint the interiors. Or mount floating shelves on wall studs (use a stud finder and toggle bolts if hitting hollow spots). This trick is common in small kitchen updates to create visual breathing room.
Cabinet Makeovers and Storage Solutions
Mobile home cabinets are typically frameless (European-style) with thinner particleboard boxes. They’re light and functional, but they don’t always hold up to heavy use or moisture.
Reface or repaint existing cabinets. Remove doors and drawer fronts, sand lightly with 120-grit paper, and apply a bonding primer. Use a small foam roller for smooth surfaces and a brush for edges. Two coats of cabinet enamel (acrylic or alkyd) will hold up better than standard wall paint. For a wood-grain look, apply peel-and-stick veneer or beadboard wallpaper to flat door panels.
Replace doors entirely. If the cabinet boxes are sound but the doors are warped or damaged, order replacement slab doors cut to size from a home center or online. Measure the existing doors carefully (width, height, hinge placement) and choose a style that doesn’t add excessive weight.
Install pull-out shelves and organizers. Shallow cabinets waste less space when fitted with roll-out trays, lazy Susans, or door-mounted racks. Most aftermarket organizers are adjustable and install with basic screws.
Add a pantry cabinet. If there’s a gap between the fridge and wall, a narrow pull-out pantry (6 to 12 inches wide) can hold spices, canned goods, or baking supplies. These are sold as kits and mount on full-extension slides.
For a deeper jump into broader kitchen renovation strategies, consider combining cabinet work with new lighting or countertops for a cohesive look.
Countertop Options for Mobile Homes
Standard countertops in mobile homes are often particleboard with laminate, which chips easily and shows its age. Upgrading to a more durable surface is a high-impact change, but weight and installation method matter.
Laminate. Still the most budget-friendly option. Modern laminate comes in realistic stone and wood patterns and costs $10–$40 per linear foot installed. It’s light, easy to cut, and can be DIY-installed with contact cement if the existing substrate is sound.
Butcher block. Solid wood countertops (usually birch, oak, or maple) add warmth and are forgiving on mobile home floors. They require sealing with mineral oil or polyurethane and shouldn’t sit directly against a sink without a waterproof barrier. Expect $40–$80 per linear foot.
Tile. Ceramic or porcelain tile offers endless design options, but the substrate must be reinforced. Lay a 1/2-inch cement backer board over the existing countertop, screw it into the cabinet frames, then install tile with thin-set mortar. Keep tile small (4×4 or smaller) to reduce weight. Grout with an epoxy product for water resistance.
Solid surface and quartz. These are heavier and pricier ($50–$150+ per linear foot), but they last decades. Check floor load capacity before installing. If the cabinets or floor feel spongy, add shims or sister joists underneath. Professional installation is recommended due to precise cutting and seam work.
Concrete or epoxy coatings. For a modern industrial look, pour a thin concrete overlay (Ardex Feather Finish or similar) over the existing laminate, or apply a multi-layer epoxy coating. Both are DIY-friendly and cost $100–$300 for an average kitchen. They add minimal weight and can be tinted or stained.
Flooring Choices That Work in Manufactured Homes
Mobile home floors are engineered differently than site-built homes. The subfloor is usually 5/8-inch particleboard or OSB over steel I-beams or wooden trusses spaced 12 to 16 inches apart. This structure can handle light foot traffic but sags under heavy materials.
Luxury vinyl plank (LVP). The go-to for mobile homes. LVP is waterproof, floats over the existing floor, and weighs around 1.5 pounds per square foot. It installs with a click-lock system, no glue, no nails. Brands like LifeProof and COREtec offer planks with attached underlayment. Make sure the subfloor is level within 3/16 inch over 10 feet: use a floor leveler if needed.
Laminate. Similar to LVP but not waterproof. Fine for kitchens with good ventilation and no history of leaks. Laminate is slightly lighter and often cheaper ($1–$3 per square foot). Avoid in homes with plumbing issues.
Peel-and-stick vinyl tile. The most budget-friendly option at $0.50–$2 per square foot. It’s thin, lightweight, and easy to replace if damaged. Clean the subfloor thoroughly and let it acclimate to room temperature before installing. Not as durable as LVP, but fine for low-traffic or rental situations.
Ceramic or porcelain tile. Only if the floor is reinforced. Add a layer of 1/4-inch cement backer board screwed into the joists (find them with a stud finder), then install tile with flexible thin-set and grout. This adds 3–5 pounds per square foot, so consult the home’s load specs first.
Sheet vinyl. Old-school but practical. Modern sheet vinyl comes in 12-foot widths, reducing seams. It’s installed with adhesive or double-sided tape and costs $1–$5 per square foot. Not as trendy, but it holds up well in mobile homes. For more budget-conscious renovation tips, consider combining new flooring with simple cosmetic updates elsewhere.
Lighting and Fixture Upgrades to Maximize Space
Mobile home kitchens often suffer from a single overhead dome light and minimal task lighting. Improving the lighting plan makes the space feel larger and more functional.
Under-cabinet LED strips. Hardwired or plug-in LED strips (2700K to 3000K color temperature) illuminate countertops without taking up space. Mount them toward the front edge of the cabinet to reduce shadows. Battery-powered puck lights work in a pinch but need frequent recharging.
Replace the ceiling fixture. Swap the builder-grade dome for a flush-mount or semi-flush fixture with multiple bulbs. Make sure it’s rated for damp locations if the home has humidity issues. Use LED bulbs to reduce heat and energy draw.
Add a pendant over the sink. If there’s a junction box above the sink (common in newer models), install a small pendant light. It adds visual interest and focused task light. Use a swag kit if no box exists, it plugs into an outlet and drapes the cord along the ceiling.
Install dimmer switches. Replace standard toggle switches with dimmers compatible with LED bulbs (not all dimmers work with LEDs). This lets the homeowner adjust light levels for cooking versus dining. Dimmers cost $15–$30 and install in 10 minutes.
Consider recessed lighting. If the ceiling has accessible attic space above, cut in 3-inch or 4-inch LED recessed cans (also called “wafer lights”). They’re shallow, lightweight, and don’t require a traditional can housing. Check that ceiling joists can handle minor cutting: avoid load-bearing beams.
Many kitchen design resources, like The Kitchn, emphasize layered lighting, a mix of ambient, task, and accent, to create depth. For smaller home renovation projects, even two or three lighting upgrades can dramatically shift the room’s feel.
Safety note: Always turn off power at the breaker before working on electrical fixtures. If the home has aluminum wiring (common pre-1970s), hire a licensed electrician. Aluminum requires special connectors and techniques to avoid fire hazards.
Conclusion
Remodeling a mobile home kitchen is entirely doable with the right materials and a clear understanding of the home’s structure. Focus on lightweight, moisture-resistant products, respect load limits, and don’t skip prep work. Whether it’s a weekend paint job or a full countertop swap, each update brings the space closer to something the homeowner can be proud of, without needing a contractor’s budget or a structural engineer on speed dial.