Table of Contents
ToggleBedrooms tend to get the leftover attention. After tackling the kitchen and living room, most homeowners run out of steam, or cash, before they get around to fixing up the one room where they actually spend eight hours a day. But transforming a bedroom doesn’t require a contractor’s budget or a Pinterest-perfect skill set. With the right approach, a few weekends, and some basic tools, anyone can turn a boring box into a space worth waking up in. This guide covers practical, tested projects that deliver real impact without wrecking your wallet.
Key Takeaways
- Paint is the highest-impact, lowest-cost DIY bedroom project, with one gallon covering 350–400 square feet and most bedrooms needing only two gallons maximum.
- Build a custom headboard using plywood, batting, and fabric or vertical wood slats mounted to wall studs to create a focal point without expensive furniture purchases.
- Maximize bedroom space by installing floating shelves on walls, adding a second hanging rod in closets, and utilizing under-bed storage with rolling bins or shallow drawers.
- Layer lighting with overhead fixtures, plug-in pendant lights, LED strips behind headboards, and bedside lamps to create ambiance and functional task lighting throughout your space.
- Transform textiles like curtains, bedding, and throw pillows through strategic color choices and layering to add depth and visual interest without major renovation costs.
- Upcycle thrift store furniture by refinishing wood pieces with proper stripping, sanding, and painting techniques to create unique bedroom elements that anchor the entire room.
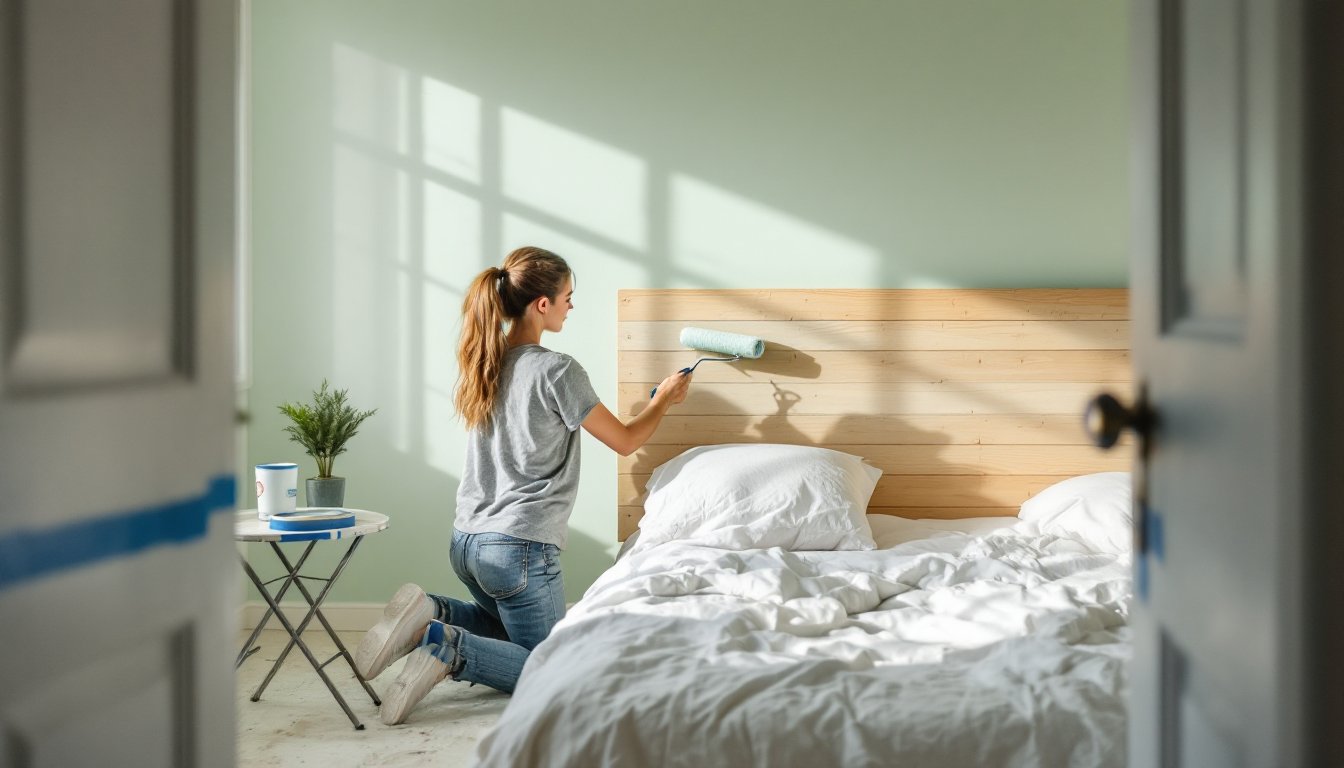
Budget-Friendly Wall Makeovers That Make a Statement
Painting a bedroom remains the highest-impact, lowest-cost project in the DIY playbook. One gallon of quality interior paint covers roughly 350–400 square feet with a single coat, meaning most bedrooms need two gallons max. Always prime first if covering dark colors or fresh drywall, skipping primer leads to blotchy coverage and wasted topcoat.
Accent walls work well if full-room color feels risky. Pick the wall behind the bed or the one facing the door. Use painter’s tape rated for delicate surfaces (the blue stuff, not masking tape) and press edges down with a putty knife to prevent bleed-through.
For texture without the commitment, consider peel-and-stick wallpaper or removable wall panels. These adhere to drywall, plaster, and even lightly textured surfaces. They’re rental-friendly and come off without damage if you pull slowly at a 45-degree angle. Quality varies wildly, spend a few extra bucks per roll to avoid paper-thin material that tears mid-application.
Board-and-batten or picture frame molding adds architectural interest for under $100 in materials. Use 1×2 or 1×3 pine boards (actual dimensions: 3/4″ x 1.5″ or 3/4″ x 2.5″) spaced evenly and attached with a brad nailer or construction adhesive. Paint everything the same color for a subtle, classic look. Measure twice, level obsessively, and fill nail holes with lightweight spackle before the final coat.
Create a Custom Headboard Without Breaking the Bank
A headboard changes the entire focal point of a bedroom, and building one beats buying particleboard from a big-box store. The simplest version: a sheet of 3/4″ plywood cut to size (most lumberyards and home centers offer free cuts), wrapped in batting and fabric, then mounted to the wall with French cleats or heavy-duty picture hangers rated for 50+ pounds.
For an upholstered look, stretch batting first, staple it to the back of the plywood with a staple gun (Arrow T50 or similar, using 3/8″ staples), then layer fabric over it. Pull tight at corners to avoid wrinkles. Trim excess and you’re done.
Wood slat headboards offer a modern, airy vibe. Use 1×4 or 1×6 boards mounted vertically or horizontally to a frame made from 1×3 furring strips. Space slats evenly, 3″ to 6″ gaps look intentional. Sand everything with 120-grit paper, stain or paint, then mount the frame directly to wall studs with 3″ wood screws. A stud finder is non-negotiable here: drywall anchors won’t hold long-term weight.
Another option: reclaimed wood or pallet boards. These need serious prep, remove nails, sand out splinters, check for rot or insect damage. Many pallet boards are treated with chemicals not rated for indoor use, so verify the stamp (look for “HT” for heat-treated, avoid “MB” for methyl bromide). Seal with polyurethane after assembly.
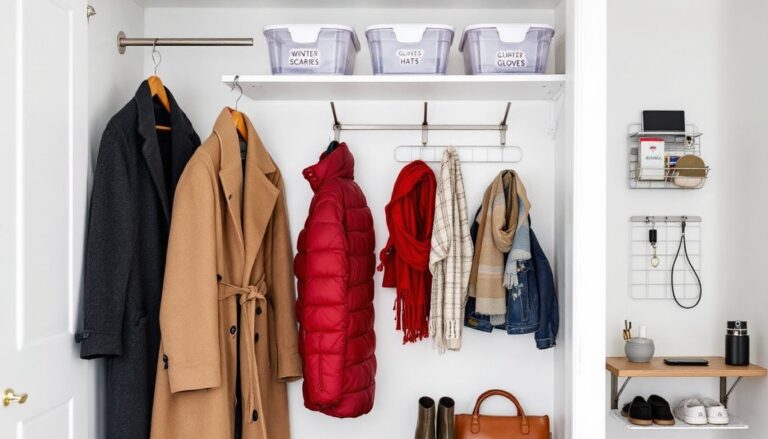
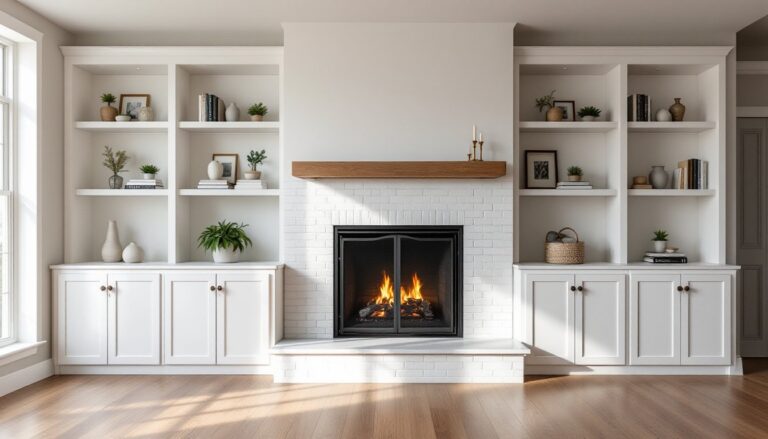
Clever Storage Solutions to Maximize Your Bedroom Space
Most bedrooms waste vertical space. Floating shelves above dressers, beside windows, or flanking the bed add storage without eating floor area. Use solid wood or plywood shelves at least 3/4″ thick to prevent sagging. Mount with heavy-duty brackets anchored into studs, or use floating shelf hardware (steel rods that insert into the shelf and wall). Each bracket should support 50–75 pounds if installed correctly.
Under-bed storage works if the bed frame sits at least 6″ off the floor. Rolling bins, shallow drawers, or DIY platforms with casters (use 2″ locking swivel casters for stability) keep seasonal clothes, shoes, or extra bedding out of sight. Measure clearance carefully, most bed frames sit 5″–7″ high, and you’ll lose an inch to the container itself.
Closet space multiplies with a few tweaks. Add a second hanging rod below the existing one for shirts and pants (most closets waste 3–4 feet of dead air). Use slim, non-slip hangers to maximize rod space. Install a closet organizer system with adjustable shelves and cubbies, IKEA’s PAX or ClosetMaid’s wire systems both work and install in a weekend.
DIY nightstands with storage beat the traditional table. Stack wooden crates (reinforce joints with wood glue and 1-1/4″ screws), mount wall-mounted floating boxes, or repurpose small dressers. Paint or stain to match the room, and drill a hole in the back for charging cables. Many budget renovation strategies emphasize smart storage as a foundation for functional design.
DIY Lighting Projects for Ambiance and Style
Lighting changes mood faster than paint. Overhead fixtures remain the primary source, but adding task and accent lighting makes a bedroom feel layered and intentional. Always follow NEC (National Electrical Code) guidelines, if you’re running new wire or installing ceiling fixtures, most jurisdictions require a permit and possibly a licensed electrician.
For a simple swap, replace a builder-grade ceiling fixture with a semi-flush mount or pendant light. Turn off the breaker, remove the old fixture, match wire colors (black to black, white to white, bare copper to ground), secure with wire nuts, and mount the new fixture to the ceiling box. If the box is plastic and you’re installing something heavy (over 10 pounds), replace it with a metal pancake box rated for ceiling fans.
Plug-in pendant lights bypass electrical work entirely. Use a swag hook screwed into a ceiling joist (or use a toggle bolt rated for your ceiling type), drape the cord to an outlet, and add an in-line dimmer switch for control. This works well over nightstands or reading nooks.
LED strip lighting behind headboards, under floating shelves, or along crown molding adds soft, indirect glow. Use 12V or 24V LED strips with a compatible power supply and remote dimmer. Stick them to clean, dry surfaces and hide the power supply behind furniture. Avoid the cheapest options, poor color rendering makes skin tones look sickly.
For bedside lighting, build simple wood base lamps using lamp kits from hardware stores. Drill a hole through a wood block or turned piece, thread the cord, and wire the socket per kit instructions. Use 3-prong polarized plugs for safety. Top with a linen or cotton shade. Wear safety goggles when drilling and cutting, and use a dust mask when sanding wood.
Refresh Your Bedroom with Simple Textile and Decor Updates
Sometimes the walls and furniture are fine, the room just feels flat. Textiles fix that fast. Swap builder-beige curtains for linen or cotton drapes in a deeper tone. Hang them high (mount rods 4″–6″ below the ceiling) and wide (extend rods 6″–12″ past the window frame) to make windows look larger.
Layered bedding adds depth. Start with a fitted sheet, add a flat sheet or duvet, layer a quilt or coverlet, then finish with throw pillows and a textured blanket at the foot. Mix materials, linen, cotton, wool, velvet, but stick to a limited color palette to avoid chaos.
DIY throw pillows cost a fraction of store-bought versions. Buy fabric remnants or clearance yardage, cut two squares (add 1/2″ seam allowance), sew three sides, flip right-side-out, stuff with polyfill or down alternative, and hand-stitch the opening. A basic sewing machine works, but hand-sewing with a backstitch holds just fine.
Area rugs define space and muffle sound, especially over hardwood or laminate. In bedrooms, aim for a rug that extends at least 18″–24″ beyond each side of the bed. Use a rug pad underneath to prevent slipping and extend rug life. Outdoor rugs work indoors if you want something washable and durable.
Art doesn’t have to be expensive. Frame fabric swatches, pages from vintage books, or your own photography. Use pre-cut mats and frames from craft stores, or cut custom mats with a utility knife and metal straightedge (steady hands required). Gallery walls look intentional if you plan the layout on the floor first, use a level, and keep spacing consistent, 2″–3″ between frames works well. Inspiration from modern decor projects often highlights the power of cohesive textile choices.
Upcycling Furniture for a One-of-a-Kind Bedroom Look
Thrift stores, estate sales, and curbside finds yield solid wood furniture for a fraction of new prices, but inspect carefully. Check drawers for smooth glides, joints for wobble, and wood for water damage or active infestation (small holes, sawdust piles). Veneer furniture can be painted but not stripped or heavily sanded.
To refinish wood furniture, start by removing hardware. Strip old finish with a chemical stripper (work outdoors or in a well-ventilated space, wear nitrile gloves and a respirator rated for organic vapors), scrape residue, then sand progressively from 80-grit to 150-grit paper. Wipe down with a tack cloth before applying stain or paint.
For painted finishes, skip stripping. Sand lightly with 120-grit paper to scuff the surface, prime with a bonding primer (Zinsser Bulls Eye 1-2-3 or similar), then apply two coats of satin or semi-gloss paint. Let each coat dry fully (check the can, usually 4 hours minimum). Finish with polyurethane or paste wax if the piece will see heavy use.
Hardware swaps change the look instantly. Replace knobs and pulls with modern options, measure hole spacing (center-to-center distance) before buying. If new hardware doesn’t match old holes, fill with wood filler, let dry, sand, and drill fresh holes with a brad-point bit for clean entry.
Dressers become nightstands, desks become vanities, and old doors become headboards with a little vision. Many affordable renovation ideas center on creative reuse rather than buying new. The key is solid bones and a clear plan before you start sanding. Projects documented on sites like Young House Love and Addicted 2 Decorating demonstrate how small furniture transformations anchor an entire room refresh.
Conclusion
Bedroom transformations don’t require a full gut or a designer’s budget, just a willingness to measure twice, sand thoroughly, and tackle one project at a time. Start with the walls or a headboard, add storage where it’s missing, and layer in lighting and textiles to finish the space. Most of these projects take a weekend or less and use tools already sitting in the garage. The result? A bedroom that actually feels like it belongs to someone, not a rental staging photo.