Table of Contents
ToggleThe entryway coat closet is a hardworking piece of real estate, often undersized, poorly lit, and stuffed with everything from last season’s jackets to random shopping bags. But it doesn’t have to be that way. With thoughtful planning and a few strategic upgrades, this small space can become a highly functional, organized zone that sets the tone for the rest of the home. Whether working with a narrow reach-in closet or a slightly larger configuration, homeowners can carry out practical storage solutions, organizational systems, and style improvements that make the space work harder without requiring a full-scale renovation.
Key Takeaways
- Entryway coat closet ideas that focus on double-rod configurations, slimline hangers, and vertical storage can instantly double hanging capacity and maximize a small space without renovation.
- Over-the-door organizers and tiered shoe racks make efficient use of underutilized closet real estate, keeping seasonal gear, accessories, and footwear organized and accessible.
- Multi-functional closet designs that integrate charging stations, pet gear zones, or seasonal storage bins allow the entryway coat closet to serve household needs beyond coat hanging.
- Simple lighting upgrades—such as battery-powered LED puck lights or hardwired closet fixtures—transform dark builder-grade closets and make morning routines faster and easier.
- Well-organized coat closets reduce daily friction, protect clothing investments from wrinkling and damage, and can be completed in a weekend for $50–$300 depending on the scope of improvements.
Why Your Entryway Coat Closet Deserves a Thoughtful Design
The entryway is the first thing guests see and the last thing the household touches before leaving. A cluttered, inefficient coat closet creates daily friction, lost keys, misplaced gloves, coats falling off overcrowded rods.
A well-designed coat closet improves daily routines. It reduces visual clutter, speeds up morning departures, and creates a landing zone for seasonal gear. It also protects investments: proper storage prevents coats from wrinkling, shoes from scuffing, and accessories from disappearing into the void.
Most importantly, it’s one of the few home upgrades that delivers immediate, tangible results. Unlike a kitchen remodel or bathroom gut job, a coat closet makeover can be completed in a weekend with basic tools and materials. The return on effort is high, both in function and in perceived home value.
Smart Storage Solutions for Small Coat Closets
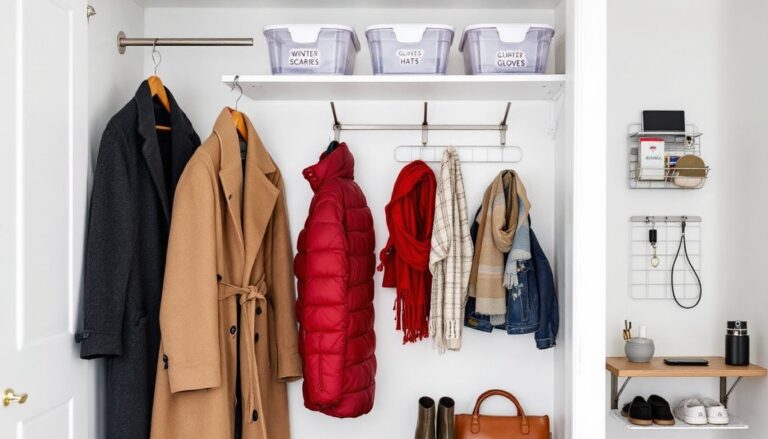
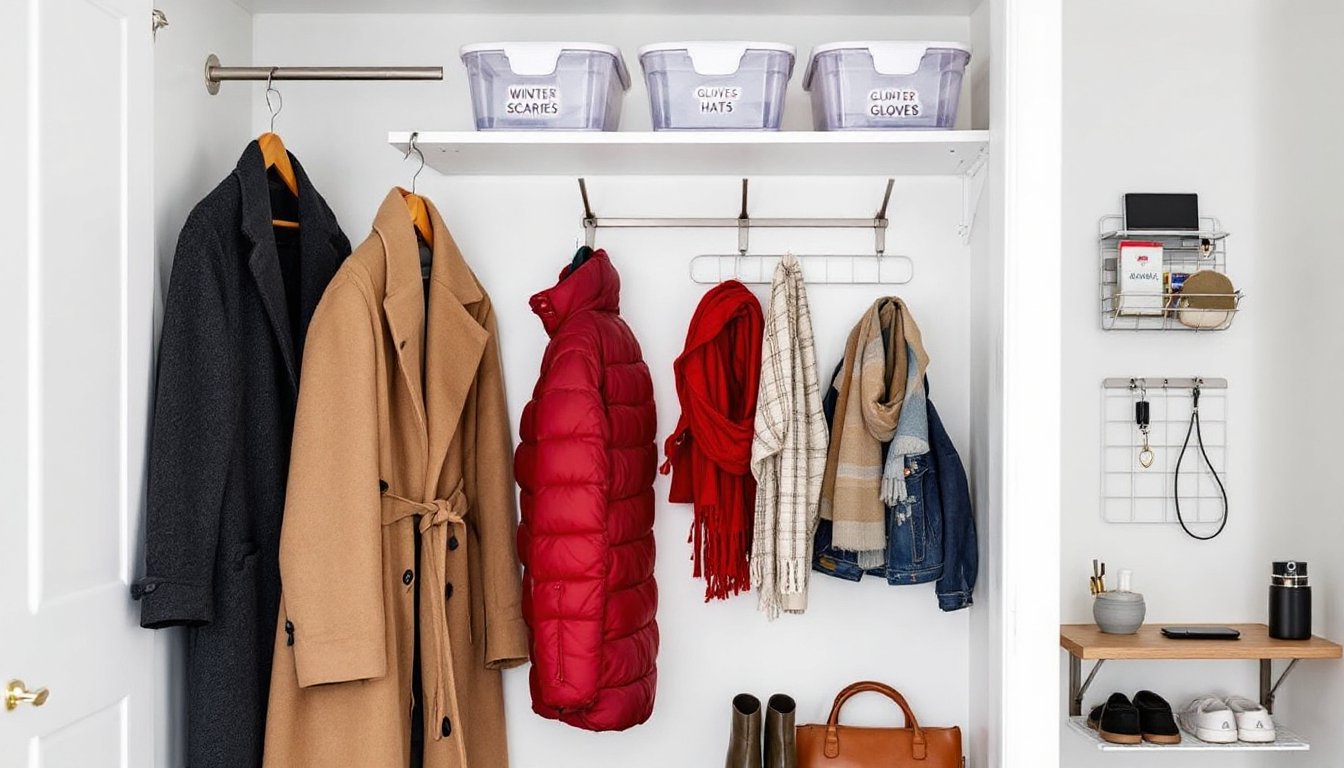
Small coat closets demand vertical thinking and zone-based organization. Standard builder-grade closets often come with a single rod and shelf, wasted potential in a 24- to 36-inch-deep space.
Double-Rod Configuration: Installing a second rod below the top one instantly doubles hanging capacity. Position the top rod at 80 inches from the floor for long coats, and the lower rod at 40 inches for shorter jackets and kids’ gear. Use adjustable closet rod brackets to allow seasonal reconfiguration.
Slimline Hangers: Swap bulky wooden or plastic hangers for velvet or felt slimline versions. These typically measure ¼ inch thick versus standard ½-inch hangers, reclaiming 3–4 inches of rod space per dozen coats.
Over-the-Door Organizers: Maximize the back of the closet door with hooks, racks, or pocket organizers. This real estate is ideal for hats, scarves, dog leashes, or reusable shopping bags. Choose metal hooks rated for 10–15 pounds to handle heavy winter accessories.
Narrow Shoe Racks: Floor space is prime territory. A tiered shoe rack (24 inches wide by 12 inches deep) holds 6–9 pairs without blocking access to hanging items. For tight spaces, consider a vertical shoe tower or hanging shoe organizer.
Shelf Dividers: Upper shelves often become dumping grounds. Installing adjustable shelf dividers keeps stacks of hats, bags, or bins upright and accessible.
Double-Duty Designs: Combining Coat Storage with Other Functions
Entryway closets can serve multiple roles beyond coat storage, especially in homes where square footage is limited.
Charging Station Integration: Install a small floating shelf or wall-mounted cubby at eye level inside the closet to hold a power strip, phone charger, and keys. Run a 14-gauge extension cord from a nearby outlet (NEC-compliant installation may require an electrician if adding a new receptacle). This keeps devices charged and out of sight.
Pet Gear Zone: Dedicate lower hooks or a pull-out basket for leashes, harnesses, and waste bags. A removable mat on the closet floor (24 x 36 inches) corrals muddy paw prints.
Seasonal Swap Space: Use the upper shelf for off-season storage bins. Label bins clearly (e.g., “Winter Scarves,” “Spring Rain Gear”) and rotate them every few months. Clear plastic bins (16-quart capacity) allow quick visual identification.
Tool or Sports Gear Nook: If the closet is deeper than 24 inches, consider adding a narrow pegboard to one side wall for small tools, bike helmets, or sports equipment. Pegboard hooks hold up to 5 pounds each and can be rearranged as needs change.
These integrations require minimal modification and can be reversed if needed, ideal for renters or homeowners planning future changes.
Organizational Systems That Keep Clutter at Bay
Good hardware and thoughtful zoning prevent the dreaded closet avalanche.
Modular Closet Systems: Brands like ClosetMaid, Rubbermaid, and IKEA offer customizable kits with rods, shelves, and drawers that mount to wall studs using L-brackets and #10 screws. These systems handle 50–75 pounds per shelf when properly installed into studs (use a stud finder: drywall anchors alone won’t suffice for loaded shelves).
Labeled Bins and Baskets: Assign a bin to each household member for gloves, hats, and scarves. Wire or woven baskets (12 x 12 inches) fit standard shelves and prevent small items from migrating. Apply labels using a label maker or chalkboard tags for flexibility.
Hooks for Heavy Coats: Wall-mounted coat hooks rated for 15–25 pounds each can handle winter parkas and wool overcoats. Space hooks 6–8 inches apart to prevent crowding. Install into studs or use toggle bolts rated for the expected load.
Drawer Inserts for Accessories: If the closet has a built-in drawer or you’ve added a wire basket drawer, use foam or felt dividers to separate sunglasses, keys, and wallets. These prevent items from shifting and tangling.
Many entryway storage systems incorporate a mix of open and closed storage to balance accessibility with visual calm.
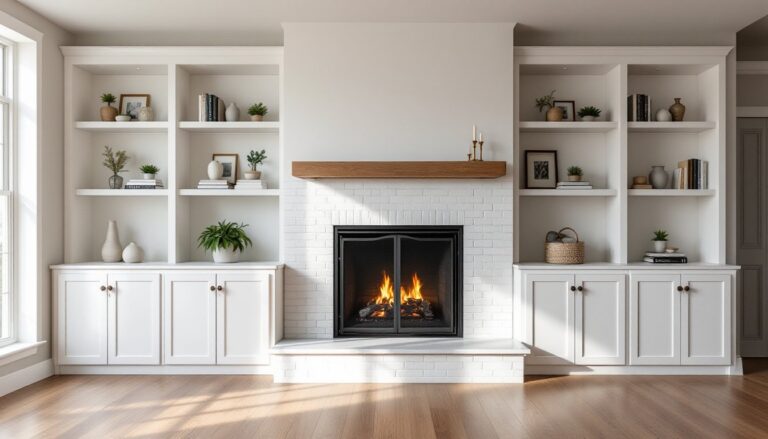
Style Upgrades: Making Your Coat Closet Beautiful and Functional
A coat closet doesn’t need to be a dark cave. Small cosmetic upgrades make a big difference.
Lighting: Builder-grade closets often lack dedicated lighting. Install a battery-powered LED puck light (rated for 50–100 lumens) on the underside of the top shelf, or upgrade to a hardwired LED closet light connected to a door jamb switch. If running new electrical, consult local codes and consider hiring a licensed electrician for code-compliant installation.
Paint or Wallpaper: A fresh coat of semi-gloss paint in white or a light neutral brightens the space and makes it easier to wipe down. For a bolder look, apply peel-and-stick wallpaper to the back wall, it adds personality without the commitment of traditional wallpaper. Coverage is typically 30 square feet per roll.
Upgraded Hardware: Swap plastic shelf brackets and rods for brushed nickel, matte black, or brass versions. Match finishes to nearby door hardware for a cohesive look. Metal rods rated for 30–40 pounds are standard: heavier-duty versions support up to 60 pounds.
Flooring: If the closet floor is worn or stained, lay down a small runner or durable mat. Rubber-backed mats resist moisture and are easy to vacuum. For a more polished look, install peel-and-stick vinyl tiles (12 x 12 inches), no special tools required.
These finishes elevate the space from utilitarian to intentional, especially important in open-concept homes where the closet is visible when the door is ajar.
DIY Coat Closet Makeover Tips for Every Budget
Coat closet projects scale to fit any budget and skill level.
Under $50: Swap hangers, add over-the-door hooks, install battery-powered LED lights, and apply fresh paint. These upgrades require only a screwdriver, paintbrush, and level.
$50–$150: Add a second closet rod, install a modular shelving kit, and incorporate labeled bins or baskets. Tools needed: drill/driver, stud finder, tape measure, and level. Expect 2–4 hours of work, including shelf assembly and installation.
$150–$300: Upgrade to a full modular closet system with adjustable rods, shelves, and wire drawers. Add peel-and-stick wallpaper or vinyl flooring. Consider hiring help for heavy lifting or precise cuts if working with laminate shelving. A miter saw or circular saw may be needed for trimming shelves to fit odd dimensions.
Safety Note: Always wear safety glasses when drilling or cutting. Use a dust mask if sanding or cutting MDF or particle board. Turn off power at the breaker if installing hardwired lighting.
For homeowners interested in larger custom projects, a walk-in closet renovation may offer inspiration for material choices and organizational strategies that can be scaled down to smaller reach-in closets.
Before starting, measure the closet interior carefully, width, depth, and height. Note the location of studs, existing rods, and any obstacles like vents or light fixtures. Sketch a simple plan to visualize the layout and avoid costly mistakes.
Conclusion
An entryway coat closet that’s well-organized and thoughtfully designed makes daily life smoother and sets a welcoming tone for the home. Whether the project involves simple hook additions or a full system overhaul, the key is matching solutions to the household’s actual needs, not Pinterest fantasies. Start with a clear-out, measure twice, and build in flexibility for future changes. The result is a hardworking space that finally earns its square footage.